11.27.2011

Nursery Wall Decor

Hope you all had a wonderful Thanksgiving full of love and thanks of course!
I created a HUGE and overwhelming list of things to do while on break.  I did NOT get them all done, however, am still trying my best!  I wanted to share with you today one wall of the nursery for our little one coming in March '12. 
This was inspired by Restoration Hardware Baby & Child (I'm completely obsessed with their stuff):


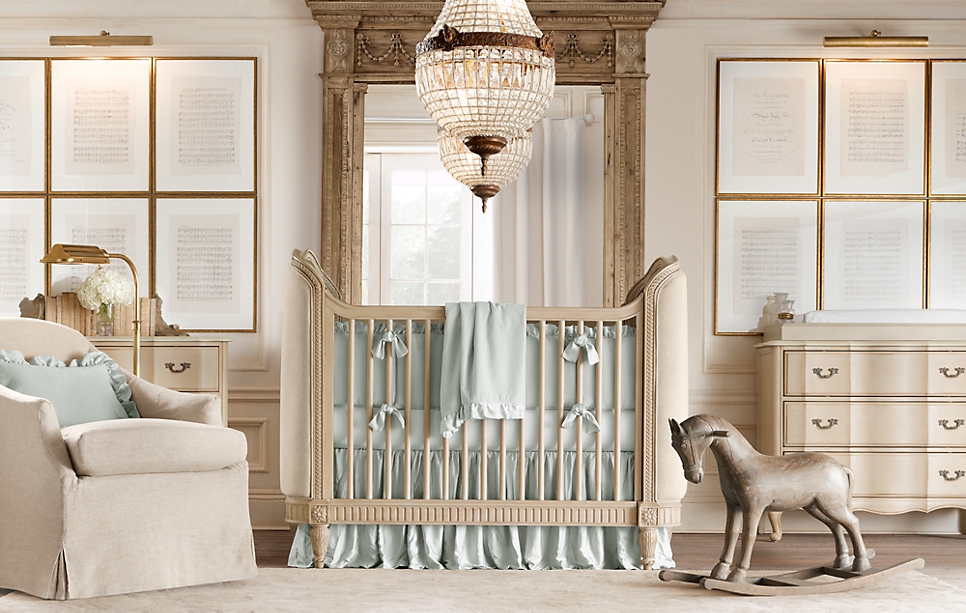
Mind you our theme is COMPLETELY different from the picture seen above...but notice the lovely sheet music frames adorning the walls?!
I found an AMAZING deal on black frames and it took a while to measure and hang perfectly, but I adore the final look!  I made sure to purchase large enough frames because I want to be able to display many different things as they come our way {his artwork/baby announcements/pictures...etc}

I'm still drooling over the furniture...love it!  The candle is the unity candle from our wedding!  You can't see it very well, but the metal airlplane under the light was made by my grandpa MANY years ago.


..Top Row..

..Bottom Row..
 I will admit, I'm not 100% sure this wall is 'done', but as for now it will be! If you noticed in the top middle picture frame we've decided on the name Lukas Michael! His middle name is my father's 1st name and my middle name is Michelle...keeping it in the family!  I am thrilled he is a little boy to carry on our last name..whew (my husband is the only boy in his family so I made it a mission of mine to make sure we have at least one boy to carry it on!)

Hopefully I'll be able to show you the other walls soon...I'm working on a painted mural and this will tell you our final theme! It is ALMOST done...eekk!  I'm trying to squeeze every minute from every day...wish me luck!

{Kate}

11.02.2011

M.I.A

HOLY MOLY its been a while huh! Just wanted to pass along the news of where I've been.  I have about a bazillion crafts/art things I've been doing just haven't had a second to upload and tell you about them!  Hopefully, here soon something will be up :)  I've got some important news that most of you already know about...ha...

I'll switch to a better picture once I'm able!
Yup...I'm 20 weeks and 3 days pregnant! This summer I was spending most of my time with "John" and revisiting my delcious meals (in which I wasn't preparing--ha!).  Now, I feel great most of the time and working outish and dancing as if I was 'normal'. 
I'll post more stuff when I grab a chance...
p.s. I'm a full time teacher...started my masters....and pregnant  (wife/sister/friend....as well of course) so my time is FULL....
 
{Kate}

9.21.2011

Santa Fe Style Rice and Beans


I've been in love with Michelinas Santa Fe Style Rice and Beans (go HERE for their nutrition facts)frozen lunch for quite and while (and might I add VERY inexpensive..$.88) I dislike strongly eating frozen meals for many reasons.

1. I love to cook and I feel like I'm cheating
2. I don't like eating processed/not the absolute healthiest meals.

However, as a teacher/wife/mom to be/friend/co-worker/daughter/etc my time is not always as I want!  Well, I looked up Santa Fe Rice and Bean recipes and none of them seemed to match my Michelinas meal (at least ingredient wise). So.....I've made my own and HOLY YUMMMYYYYY!


Kate's Santa Fe Style Rice and Beans

2 cups cooked rice (use chicken broth) (I used min. rice)
1 (15 oz.) can red beans (rinsed and drained)
1 cup corn (I cheated with frozen)
2/3 cup green bell pepper
1/3 cup zucchini
1/2 of a jalapeno pepper
2 T green chilies
1 cup sour cream (reduced fat)
2 T milk
2 cups of mixed mozzarella cheese and cheddar cheese (save 1 cup for on top at end)
squirt vinegar
1 t minced garlic
2 T margarine
Spices:
1/2 tsp chili powder
1/2 tsp salt
1/2 tsp paprika
~~Mix beans, corn, 1 cup of cheese mix, rice in a large bowl
~~Melt margarine in saute pan and add garlic (saute!)
~~Add in all veggies
~~Mix milk, sour cream, vinegar, and spices.  Then add to saute pan.
~~Heat and stir, once mixed add to bean mixture, stir, and pour into 9x13 dish.
~~Put in oven, uncovered at 350 degrees for 30 min. for the last 10 min. add 1 cup of cheese mix on top!
Um...yum! Let me know if you tried it and how it tasted.  Hubby and I used tortilla chips to dip into it even! 

NOTE TO SELF: this is a work in progress since I created it from scratch...I think next time I'll double the amount of sour cream and milk b/c I want it a little more saucy...Hubs liked it just like this! Also, I want to ask my brother-in-law for a great Mexican chicken marinade to add some delicious chicken to this dish!

{Kate}

9.13.2011

DIY Wedding {ring bearer pillow}

As I mentioned in my veil and headpiece post I had a collection of my family wedding heirlooms!
My mother made my aunt's and her wedding dresses so we had leftover fabric from each.  I KNEW I had to use it somehow.  I ended up deciding to create my ring bearer pillow form from my mom's fabric, the silk outer pillow from my aunt's wedding dress fabric and a pearl necklace of my grandmas.  I, also, had received as a gift from my bridesmaid Lisa some green ribbon and I used it as my flowers. 
Simple to make, sentimental in value! I made a simple pillow out of the fabric, and hand sewed the pearl necklace on around the edge (the necklace was already tubular in shape).  After I handmade all the flowers and sewed each on to create my little masterpiece for my sweet ring bearer to carry!
..i love it..

after the ceremony
.. son of blogger: squeezing it all in ..

ha...I wear two rings! The diamond and the fat bright sterling silver rings are mine, my hubby's is the one on the bottom left...hammered was one of our 'themes'!
If you need/want more instruction or questions, let me know.  I'd be MORE than happy to help!
{Kate}

9.12.2011

DIY Wedding {Veil and headpiece}

I knew I wanted to use vintage items for my wedding....well, since I knew what a wedding was! My mother had saved a bunch of special family wedding items and when I got engaged we looked through the collection to see what could work for mine.  I ended up using a bunch of things, however, today I want to share with you all my veil and headpiece.  My grandmother had used as a veil a white, beaded headband thing with white (since yellowed) toole. 
.Walter and Kathryn Goodin.

.Walter and Kathryn Goodin.
I loved the white beaded piece and knew I had to attempt to make it work.  I hadn't picked a dress out yet, so it was important to take it with me!  My mother was heavily involved with the following process (well, really she did it all, I was WAY TOO NERVOUS with a family heirloom).  She and I called a bunch of different services/restoration specialists.  None of them wanted to
#1 do it themselves
#2 tell us how they'd attempt it due to liabilities
One sweet man (after my mom worked her convincing magic...amazing) on the phone finally explained his ideas on restoration and my mom went to work....bless her!
Pre-Cleaning

Pre-Cleaning...upclose...look at that beadwork!
Days, sweat, anxiety and multiple cleaning products later we had what we wanted.

My dear bridesmaid Lisa cut the veil fabric the day of the wedding (no sweat right).  I had ordered Russian netting over the Internet (hard to find here in Cincy).  Lisa cut it for me (I was too nervous) in a big rectangle.

what a great friend....as I laugh at her...
we wrapped this around my side bun and bobby pinned it down
..Tracy putting it all together..
I loved my veil and headpiece and wouldn't change my decision for the world! I meant so much to me to have something of my grandma {who past when I was in high school} ON me for our wedding and could feel her presence and love all day.


{Kate}

9.05.2011

Cross Country Friendship Quilters: Finished Blocks

Oh...good ole Labor Day Weekend....I spent many hours at my mother's house piecing away!  I finished all that I could: YAHOO!  I still have to put my quilt together, but it is getting closer to done (and I LOVE it)!!

I'll let you in on some of the pretty things my mom and I have created.  Please keep in mind, I am unexperienced and my mom is well: MASSIVELY experienced!
{be kind}

by: Kate {for Nancy}


by: Kristy {for Nancy}


by: Kate {for Peggy}


by: Kristy {for Peggy}


by: Kate {for mom/Kristy}


by: Everyone! {for Kate, and it's still in progress}

Enjoy! I'm proud of myself (and my sweet, knowledgable momma).

{Kate}

8.29.2011

DIY Wedding {flowers}

I am NOT a florist. I don't even attempt to be a flower arranger for my own house.  So, when I decided to do all my wedding flowers on my own...commence sweat!  I talked with a couple different floral companies and individuals, who really did help me.  However, still out of my budget!  So, I was able to use a wholesale flower company in downtown Cincy and create my mental picture!

I used hammered items throughout our wedding {rings, centerpieces, buckets, flower holders}.
When I found these hammered flower holders....holy excitement!!
I knew then, doing the flowers myself might just work.
I researched/priced out all the flowers I wanted to use that would be in season.

Here they are:

Green Button Mums
Green Fuji/Spider
Green Dianthus (love these)
Mini Green Hydrangeas
Green Hypericum Berries

My sweet helpers came the day before the wedding to put all my ideas (and theirs) together!
..Enjoy..


I wasn't sure how it was turning out....and I don't hide my emotions...

considering a new career path in floral!!

My bouquet and our shoes

love the green!

Mother's bouquet

Bouquets and men's boutonnieres
For our ring bearer, his mother (my pianist and long time friend) made him a boutonniere out of fabric...precious! My flower girl carried a homemade holder for petals!


For the alter, we choose to purchase two topiaries (my fave) and then we wanted to plant them outside our front door after the wedding.  I found them here in OH (my home state) and I found out they had been grown in OR (my hubby's home state), so I knew they were the ones!

I ended up loving doing my flowers (in the end once they were gorgeous).  They ended up being much easier than expected and since I didn't do centerpieces including flowers...I was able to handle it all! 
~thanks to my flowers helpers, couldn't have done it without you~


{Kate}